Wednesday, March 20, 2019

Upgrading Your Spirit Showcase Part II


I recently wrote about how to handle upgrading your collection of nicer liquors. Getting a new bar cart and losing the bottom shelf liquors were some of my first suggestions to really take it up a notch and show you’re serious about your collection. But since then, I’ve come up with a few more that will polish off your collection so that no one mistakes you as the true spirit aficionado you are.

First off, though, make sure your liquors aren’t too cluttered together. I’ve seen pictures of people showing off their lineups and the bottles are almost touching or hugging one another. Whether this is in a straight line or there are multiple bottles behind the first line, I find this to look rather congested, trashy, and unsophisticated. If you’re going to show off a lot of bottles like that, dedicate more space, furniture, or compartments for them to space them out and let each shine.

Decide on a dedicated spot.
Don’t scatter multiple liquor bottles throughout your home, even if you are a huge collector or afficionado of one spirit or another. This will just make you look like a showoff alcoholic. Like I mentioned above, make sure you have a specific cabinet, shelf, desk, or wall compartment for your collection. The whole display should look as if that area is dedicated to your liquor lineup and not like you just plopped them down randomly somewhere.

Keep it to two types of spirits or less.
We know that you may be a huge fan of bourbon, a long time drinker of vodka, and a budding enthusiast in tequila, but if you can keep your liquor bottles to two spirits or less, that’s probably better. Otherwise, things can look crowded, not uniform, and not very calculated. In fact, I’d suggest trying to whittle it down to one spirit if you can, but if you’re proud of your palate in both vodka and bourbon, by all means show both off. I’d simply recommend keeping the two collections opposite one another or separate entirely if you can manage.

Clean up the empties.
I know that your first bottle of Don Julio is a prized possession of yours, but really, if you loved it so much, you’d already have another waiting to replace it. The only time I think it’s appropriate to still have an empty bottle on display is if you’re currently unable to find another bottle in your area (for rarer breeds). If that’s the case, I can’t blame you for wanting to keep it up there if only as a reminder to yourself to seek out that rare spirit.

Upgrading Your Spirit Showcase


I’ve always considered myself a beer guy, enjoying pretty much anything from cheap domestic light beer (for those hot summer days with my family back home) to limited release sours. No matter what type of beer it is, I’ll always give it a taste if it’s new to me, and more often than not I enjoy it enough to buy a four or six pack.

But recently, I’ve stepped up my game and started trying out tequilas and mezcals. And let me tell you what, it’s been a heck of an experience. I’ve already begun dipping into some better middle shelf choices and collecting a few bottles for a new collection. I never thought I’d be the type of person to buy more than one bottle at once (until it was gone and I drank it all), but it’s happening faster than I realize and I’m loving it.

The thing is, I’m wanting to make sure my “setup” is pretty classy without being too trashy. That’s a hard line to straddle if you’re not aware of the brands of liquor you’re buying, how much you’re collecting, and where you’re putting it all. So check out my few tips on how to pull it off right.

Get a bar cart.
If you’re especially a wine lover or a self-proclaimed mixologist and enjoy experimenting with new cocktails, a bar cart goes perfectly with whatever other furniture you’re going to use to display your collection. The cool thing is that having a bar cart isn’t just for fun and looking fancy; it’s actually useable and has some utility. Most won’t cost you more than a nicer bottle of liquor as is, so don’t write it off as too expensive and make the plunge for your collection.

Get rid of the bottom shelf liquors.
Unless you’re absolutely sure that you enjoy Jose Cuervo’s cheap stuff (which I highly doubt if you consider yourself a tequila connoisseur), don’t put anything on display that’s cheap or considered bottom shelf. It doesn’t make your collection look any more impressive by adding another useless bottle to the mix; rather, it makes you seem like you’re game to put any and all alcohols you drink up there, which looks rather bad. Stick to your middle shelf and top shelf spirits if you’re seriously considering going all out with a display of your collection. Otherwise, just keep the cheap stuff in the upper cabinets above your fridge like everyone else.

Tuesday, December 11, 2018

Using Everyday Items in Your Newly Opened Bar, Brewery, or Pub


If you’re an entrepreneur and beginning your new beer venture, you may have all the essentials tied down for the establishment itself. But what about the secondary things like theme and decorations? At times, you may be at a loss of what to do in order to attract the most diversified crowd. If you go too bright and modern or even niche, you may only attract a younger crowd. However, if it’s too dingey, dark, and enclosed, an older crowd may be reminded of old haunts and dive bars. If you want a nice blend of both, though, think about these materials to include in your establishment that will cost you next to nothing.

Tin.
Patches of tin or even bigger sheets of it is a rustic and easy way of creating something other than a blank and monochrome wall. You don’t even have to make the planks of tin evenly aligned, really. Intersperse it among your open walls to make it look artsy and sporadic and it’ll blend in just fine with some darker and more muted colors like black, brown, and grey.

Cardboard.
Have you ever seen art made out of cardboard boxes? It’s quite amazing, actually. I came across some at a festival recently and was almost inspired to buy some. Every piece seemed to have a 3D effect in which a focal part of the art was painted on a secondary layer that protruded from the background layer. I saw things from Invader Zim to other original art.


No matter what your establishment’s theme is, contracting an artist to produce some original cardboard art could be a great move for a younger generation to admire. The best thing is that you can provide the medium with old cardboard boxes from beer containers. Think about if the original art on these boxes was factored into the new art on the cardboard. Classic.

Old beer cans.
I’m not sure about you, but I love this idea. Seeing old beer cans of classic breweries and brands is awesome to me, especially to see how much logos and even cans have changed along the way. Whether you do this with cans or bottles is up to you, but it’s a way to create a little bit of “beer art” among your establishment. Think about lining them up along walls on shelves, counters, or even tables. It’s a way of going antique without dropping hardly any cash at all.

Saturday, October 13, 2018

Moving With Ease


When moving locations, it is important to have a few key elements under your belt to move accurately. A few of the elements are packing smartly, loading smartly, and unloading smartly. However, many people who move may not know this and they just throw their things around and wonder why it broke by the time they reached their new destination. Therefore, in order to help you understand how to follow these few key elements, there is a short brief below to make the move easier.

Packing Smartly
As you all know, there are ways to pack your belongings in an orderly fashion that will keep your stuff in the same condition it was in prior to it being moved. When you pack in cardboard boxes, you will need to make sure that your stuff is not packed too heavy. A cardboard box is not meant to be a stainless steel crate that you can load down. They can break with ease if your stuff is not packed the smartest. For example, if you have a large stack of dishes, and some pots and pans, it is smarter to separate the dishes and pans to a few cardboard boxes and then add some plastic ware on top, instead of all the dishes in one box. This will ultimately help you disperse the weight of the items and make the boxes easier to handle and lift. Another smart option would be to mark each cardboard box, so when you are unloading you have an idea of what is located in that box, making it easier to separate the rooms as you are unpacking them. To top this off, it helps with any potential damages that could occur, it can make sure you have your delicate items loaded last, and unloaded first.


Loading Smartly
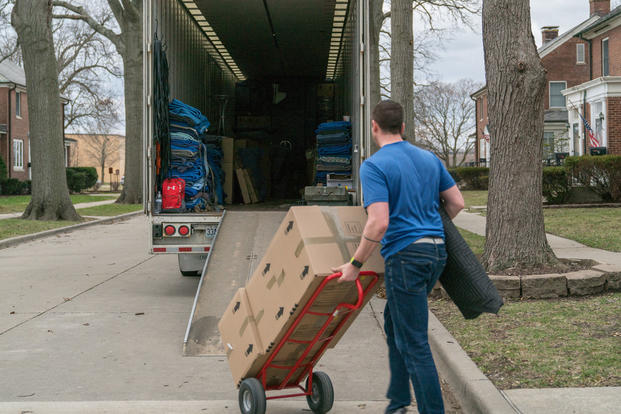
This brings us to the next step of moving with ease. Loading your moving truck or vehicle in a smarter fashion. As you start to move around your home, most people realize that there are heavier items that may take some help loading. If you are doing this by yourself, it is smarter to always remember to load your belongings in a dispersed weight factor. For example, if you have a stove, fridge, and a bed, load the items first before the boxes, but place them in the right areas of the truck. You will want to disperse the weight throughout the truck, versus loading them all together. This will help with moving easier because the weight will not be localized but dispersed throughout the truck. This helps with the safety of your items as well. As you are packing up your truck, make sure to put larger level items on the sides of the truck rather than on top of boxes. This again helps with the stability of the move. Think of the moving truck like Tetris, load in a smart fashion, but make sure each side has the same distributed weight.


Unloading Smartly
Once you reach your destination, unloading can be overwhelming. However, the easiest way to unpack a truck is to try to remember how it was loaded. The fastest way to unload a truck is to go in reverse on how you loaded it. For example, if you loaded the small boxes of a sewing kit last, that might be the first thing you get when you start to unload. You will eventually get to the sewing matching located at the bottom of the truck, but because it is packed smartly, and loaded correctly, you will know right, where it is if it was marked correctly. Marking your boxes will help ensure unloading will be easier to accomplish. It will also help your friends, family or professional movers to know what and where to put the box, as they are unloading.

Final Thoughts
In conclusion, following the few key elements above will help your move be easier and smoother. To top that off it will be less stressful throughout the move. Just remember to ask for help if moving is too much, that is why there are companies out there, they want you and your stuff to stay safe, you do not always have to do it alone. If you remember to pack smarter, load smarter, and unload smarter, you will be enjoying your new place with ease.

Wednesday, May 23, 2018

Getting Free Boxes for Moving


Moving is a stressful process which doesn’t only bring a lot of disturbance but it also causes financial troubles, at least for the time being. At this stage, you may be thinking about saving every dollar you can possibly save. One of the expenditures that no one likes to look at is the one related to cardboard boxes. When you think about purchasing these boxes for moving, you can easily expect the price to range somewhere between $20 and $50. Generally, you can start saving cardboard boxes six months ahead of moving day.

Finding free moving boxes
There are certain places from where you can find free moving boxes. The best place to start your search is the nearby grocery store. You just need to go to the store and any employee if they have cardboard boxes stored in the back. Since these stores deal with the wholesaling and retailing on larger scale, it is quite possible that they would have stored cardboard boxes. And since these stores do not use those boxes normally, it’s not the liberty or a huge favor that you ask for when you ask for the boxes.

Places like Sears, Best Buy, Walgreens, and even gas stations usually deal with the inventories. Hence, they are most likely to have cardboard boxes folded and stored. So, they wouldn’t mind giving you some of those boxes for free as long as they are free to serve your request.


Other places from where you can get free boxes
If you are a good planner and you believe in planning your move quite ahead of time, there are many ways you can get free moving boxes. Holidays, big shopping weekends, and birthdays are the times when you can hunt for the boxes.

You can also ask your friends and family to provide with any cardboard boxes which they have but they don’t need those boxes. Especially after the holidays, most of the houses have to deal with an overwhelming amount of cardboard boxes. Most of those boxes are thrown away because they are not needed. You can grab this opportunity to have complete supply of cardboard boxes for your move. Thus, you can go to your neighbors, friends and acquaintances to ask for the boxes.

Summing up all, getting free boxes for moving is not something very difficult. You just have to ask for it from nearby stores, friends and family.